|
  |
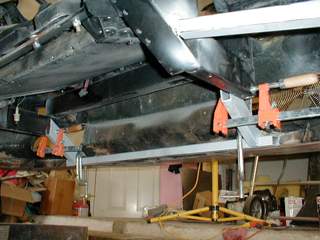
Before I moved the radiators to the rear. This would be a
setup for a single radiator. |
These are the pieces and I have it temporarily set up to check
for clearance. I hooked up the compressor and may need to do some
adjustments to get the lift that I need. |
  |
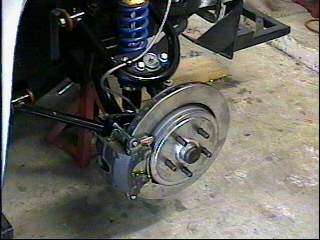
| The 11" brake package from RCC in Fort Worth has now been
installed. The package was very complete complete with detailed
instructions. |
   |
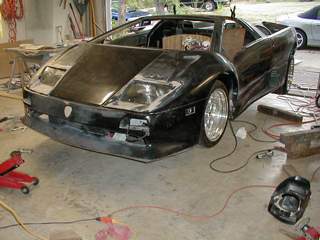
| When I was in California, I spent part of Friday at IFG. This is a
frame ready for a car. Note the diagonal brace for additional rigidity.
The front framework is now done considerably differently than the video in
the instruction manual. I like the new method and have done the following
modifications. |
  |
| I removed the frame as shown in the top pictures. I welded the lower 2
x 3 tube and then put the body on. Once the body was located with the
plate attached to the car, I tack welded the plate to the horizontal 1 x
3, removed the screws that were through the body into the plate and
removed the body. I then added the square tubes to permanently fasten the
plate to the frame. I am only running the condenser up front. I will
fabricate a bracket to hold the fan assembly. |
![]()  |
| The dash on the left is from a car at IFG that I saw when I was going
to Knotts. I created the frame for my dash after removing all of the metal
from the top of the dash. I will fill in the front with sheet metal and
duct the front air lines into the metal. As you can see from the IFG
picture, they simply put a plate with 4 tubes coming out to go to the
vents. |
  |
| Now that I have the condenser installed, It was necessary to fabricate
a bracket to keep the fan off of the condenser. The front assembly is now
complete minus the electrical connection and the sheet metal to make sure
the air flow is forced through the condenser. |
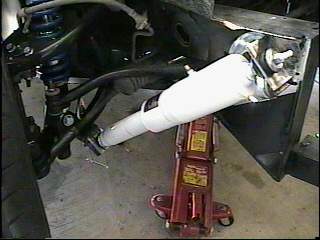
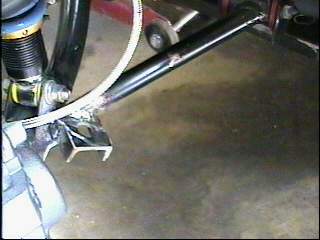
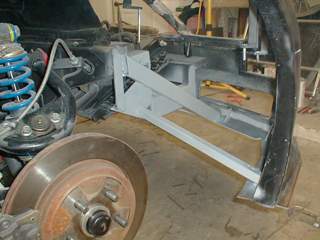
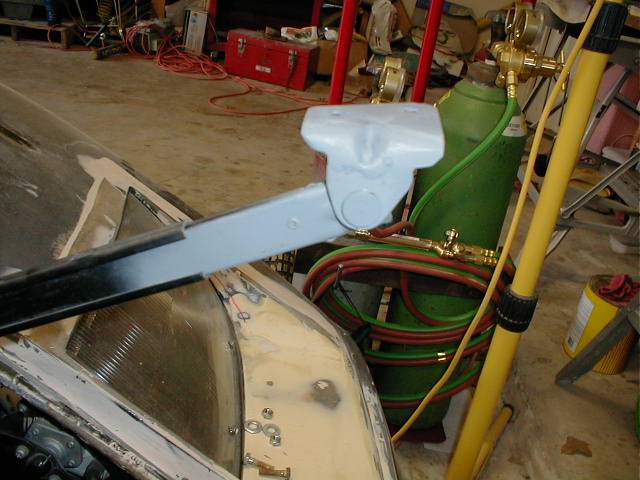
| I got the air shocks mounted this weekend. I used the original shock
tower location and fabricated a bracket to hold the top of the shock as
close to vertical as possible. I welded a bracket on the base of the
suspension to connect the bottom of the shock. |
 |
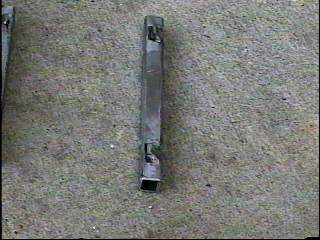
| Got revised brackets from Ryane Motors Sports. Daryl powder coated
them and the finish is fantastic. |
![]() |
| I mounted the windshield wiper motor and connected the heater
controls. I have also temporatily put in the Old Fiero guages. I may be
able to use some of the indicators such as the Check Engine light, and I
also can verify the lights all work. |
  |
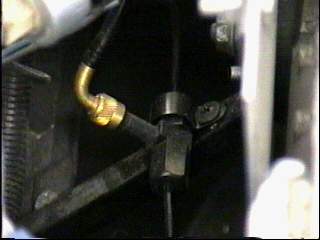
| I replaced the steering damper with a new one. |
 |
| I made two brackets to mount the compressor for the air shock. These
brackets were made from 1/2" tube with small teeth welded onto the sides
to that act as a clamp to hod the feet of the compressor. I mounted
it to the left of the wiper motor. I may move the gauge inside to be able
to tell how much pressure I have in the shocks. I installed grommets
to route the air lines lines through the fenders. |
 |
| I have decided to relocate the air compressor for the air shocks next
to the brake cylinder. This was necessary because I want to put the
battery in the front. |
  |
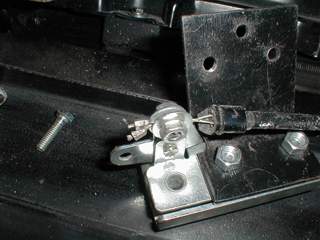
| I finished the cabling for the battery. After I was all done, I had
neglected to take into account the hinge for the trunk. I will have to get
creative as I like where the battery is and besides, I cut the 15' cable
to fit the current location. Oh well. |
  |
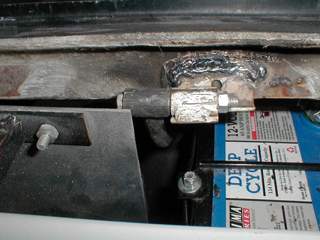
| I have been trying to come up with a way to regulate the air shocks
from inside the car. I found an airlift system that has the power, release
and a guage all mounted to a compressor. It is for the Air bag type shocks
as seen in the August Kit Car Illustrated. I replaced my old compressor
with the new one, got a special connector that connects to the Gabriel
fitting and wired the guage, power and air to the new guage. This
will allow me to back into my garage without hitting. I am boing to put a
steel plate under the bumper so I do not crack the fron lip if I should
tap something. As you can see I have very tight clearance even with it
inflated. |
 
 |
| I needed to make a modification to the front trunk. Because I moved
the hinges, I believe there was too much give in the hinge to allow the
trunk to conform to the body. My solution was to warp the hood a slight
amount to accommodate the discrepancy. By clamping the hood in the
position I wanted, I needed to hold it in position. I bent a piece of
square tube to match the contour that I needed. I then bonded it in place.
Glassed it in and then put the pieces back. |
 
 |
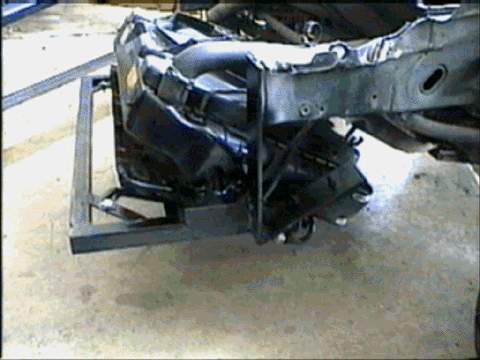
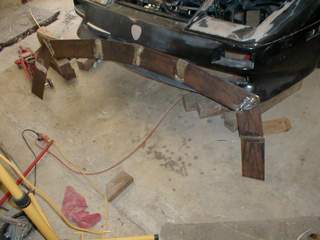
| I wanted to put a skid plate under the front lip. I used a piece of
foam to mark the outline of the front lip. I cut and welded a piece of
3/16" x 5" plate to match the contour. I then welded it place to the piece
of tube that I had already bonded into the front nose. I then fabed a
bracket to support the lip and tie into the radiator bracket. I then added
a piece that spanned the entire brace from skid plate to original frame.
This provided me the rigidity that I needed. I can now jack up my car from
the front bumper. I will grind the edges and finish it so it will look
like one piece. I also tied in the sides so the fender wells are now
solid. |
  |
| I had to do a modification to the hinge to bypass the battery. (bad
planning on my part.) I ended up adding a plate to connect to the bolts in
the trunk lid. It was necessary to reattach the hinge point on the window
cross bar. |
  |
| I used the Fiero trunk support and adapted it to the trunk lid. It was
necessary to cut a new stop point for the catch as the diablo trunk opened
differently than the Fiero. |
 |
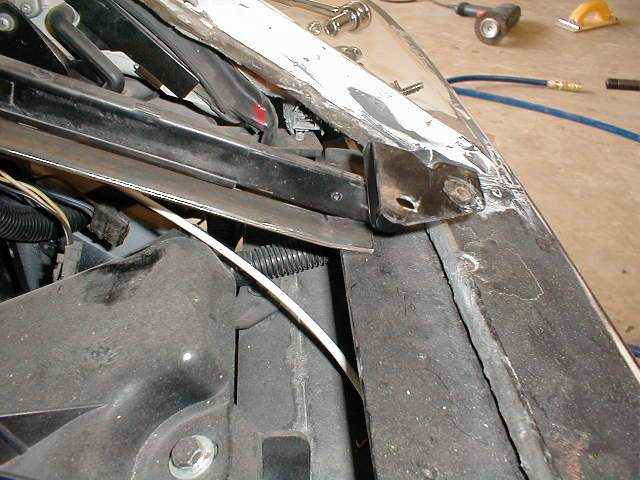
| To clear the latch, I had to remove a section of my condensor brace. I
used the two cables from the Fiero Trunk lid but will replace with a
longer cable. I split a 1/4" bolt to hold the cables and tightened nut to
hold them in place |
  |
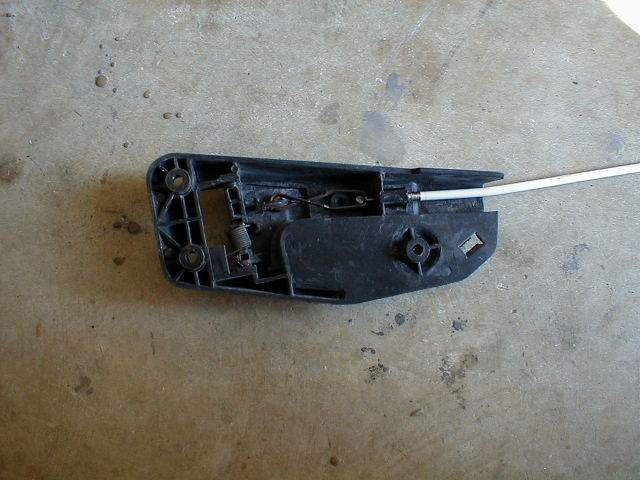
| For the front trunk release, I used the Fiero hood release. I cut the
end off of the Fiero Cable (had dual cables in it) and drilled out the
plastic end to accept a bicycle cable. I ran the cable through the clip
and back into the housing and extend it to the front. It was necessary to
put a spring on the latch to pop it back after it had been opened. To hold
the spring it was necessary to ad a brace for it to rest against. |
  |
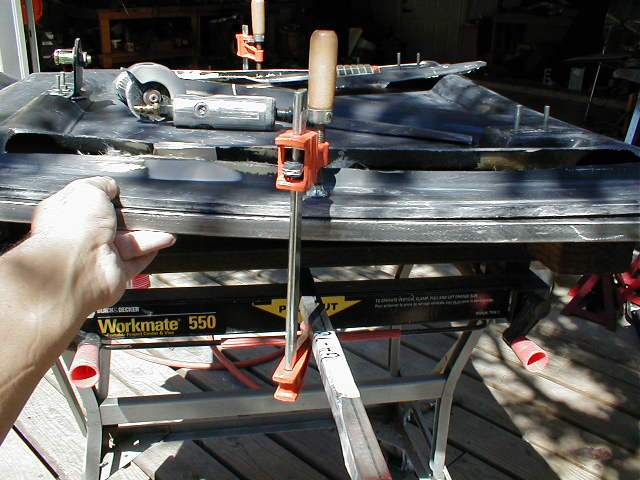
| I needed to reshape the front trunk. My earlier attempt with the 1/2"
rod wasn't strong enough or long enough to hold the shape. I started by
bending a piece of 3/4" square tube that was 24" long to match the
contour of the front fender on each side of the trunk opening. I drilled
holes to accept the bondo which should make it more stable. I then used
clamps to warp the trunk lid to match the shape of the tube. I had already
cut out the openings on the inside of the trunk to accept the new tubes. I
just made them longer and wider. This helped me to get the old metal
out as well. I then applied bondo to the tube and set it in the slots.
After they had dried, I used fiberglass mat and cloth to secure the tube
to the trunk lid. I also took the opportunity to bond a piece of
1/4" flat bar to the back side of the trunk brace. I threaded the metal
and now I have a solid support for the trunk brace to keep it open. I used
bondo and replaced the pieces I had cut out, sanded them down and now I
have the proper shape, solid mounting holes and a little more weight up
front which I will desperately need. |
 
 |
| I routed out the opening for the third emblem in the front of the
trunk. I am sanding down each piece as I work on it that is why it looks
dull. |
  |
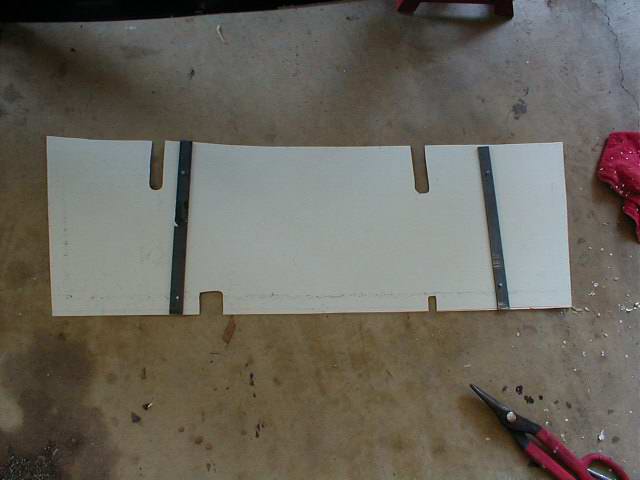
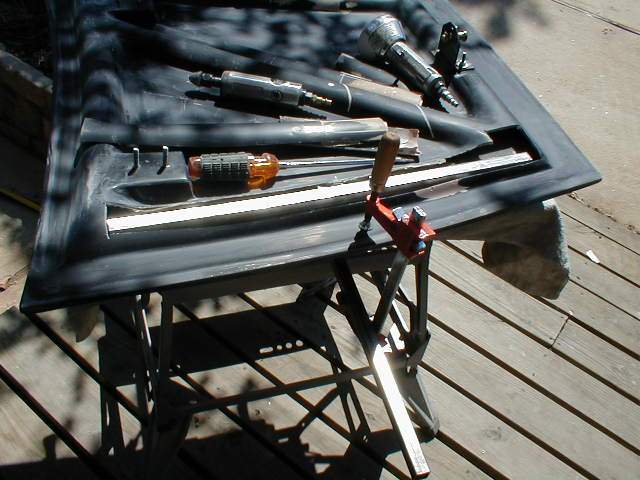
| Began working on the front trunk floor. I used 1" side straps that
were bent to fit the form from the front lip to the cross bar. The front
side was fastened by drilling and tapping the existing plate. The top side
was fastened by bolting through the 3/4" bar with 1/4" bolts. I cut a
section out of the trunk lid support to make it shorter so it would clear
the strap. Once the straps were fitted, I used poster board to trial fit
the floor for a pattern. |
 |
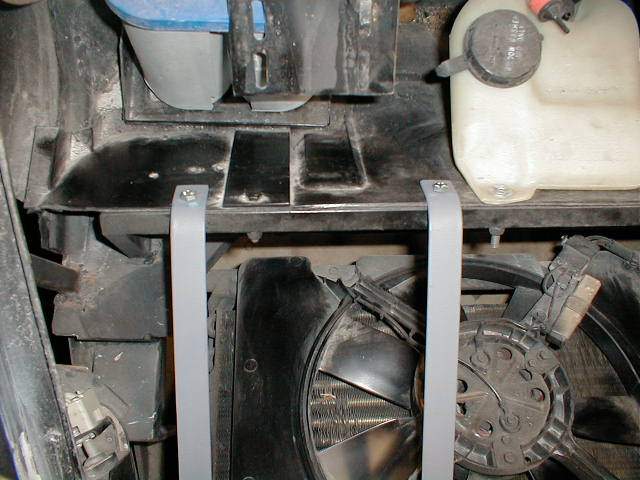
| Slight modification to the slats on the front trunk. I used a 1/2"
tube that is bolted to the 3/4" tube on the front. I spot welded the nuts
on the bolts that were holding the battery holder, window washer and air
compressor brackets. I then cut and welded the straps to the 1/2" tube and
then bolted the tube to the 3/4" tube. I tapped the holes so it could be
bolted without having to have nuts on the other side. I cut sheet
metal to fit and fastened temporarily with sheet metal screws. |
   
 |
|
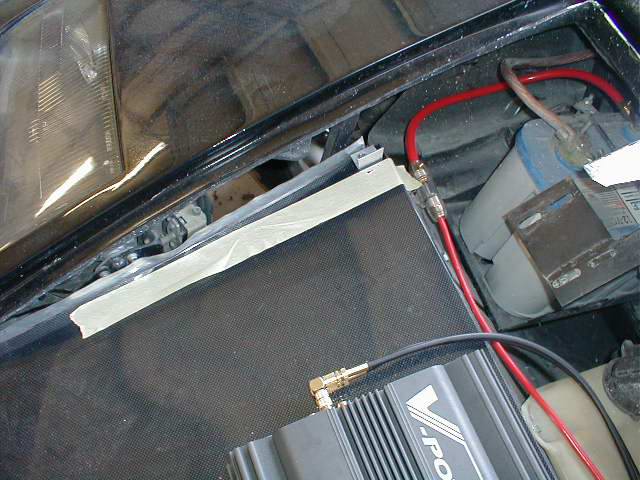
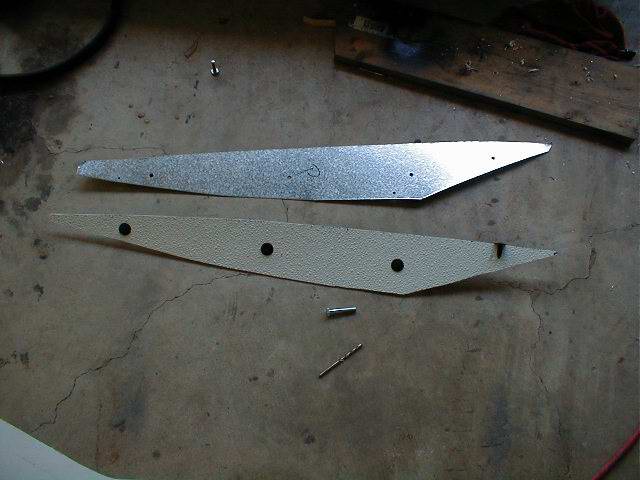
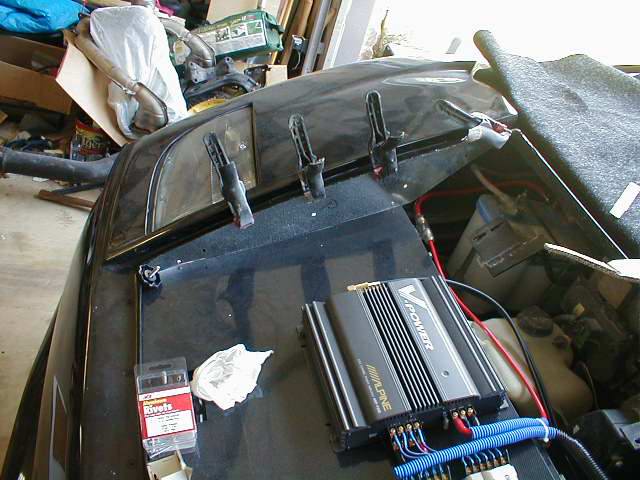
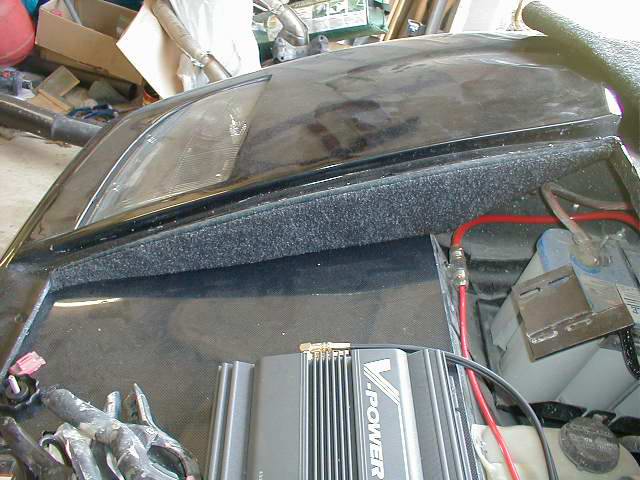
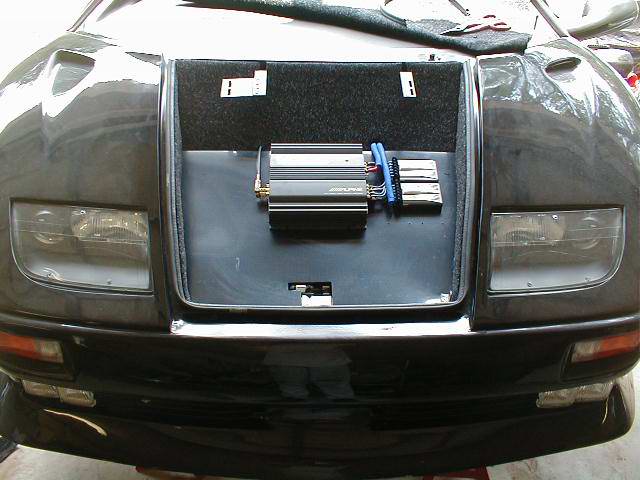
Lastly, I
completed upholstering the front amp area with trunk carpet. I
started by making a metal insert to fill in the gap. This was
fastened at the top and bottom with pop rivets. I made a panel
our of my FRB board and used one way fasteners to secure it to
the metal. I drilled the holes for the panels prior to
mounting them in the car. This made it easier. I then
upholstered the sides and fastened them in place. The
upholstered panels were shorter than the metal panels by the
height of the weather stripping. I made a template for the
area to cover the battery, air compressor, etc. added some
flat bars for rigidly and then covered it with the trunk
carpet. It now has a very clean look. |
|
|
| |
| |
|