|
To fasten the panel to the door, I used a combination of hidden
fasteners and stainless steel button head screws. The hidden fasteners I
purchased from JC Whitney. I drilled holes in the door itself to make sure
I was not hitting a screw that held the door frame. I then ground a bolt
to a point and put a nut on it and inserted it into the hole. By placing
the panel on the door and pressing down, it would mark the location on the
panel that I would need to drill the hole for the fastener. I had pulled
back the leather and inserted the fasteners through and carefully repeated
the process for all 4 fasteners. I then glued the leather over the
inserted fasteners with contact cement.
 
|
I drilled a hole through the door frame and welded a 1/4" bolt that I
would fasten an L bracket to. I bondoed and glassed this bracket in place
to the door panel. This allowed a secure connection from the panel to the
door frame to take the stress of pulling the door closed. I fabricated a
bracket that was bolted to the door opener and the cable connection. The
bicycle cable was wire tied to the bracket and the cable was fastened to
the handle. There is enough slack in the cable that the door panel can be
lifted off the door and removed if necessary.


|
To cover the speakers on the inside, I had a suggestion from a viewer
to use a cool whip container and velcro to fasten to the inner door panel.
Because I needed access through the speaker opening to bolt the panel to
the frame, I could not permanently fasten the speaker cover. Once the
panel is bolted in place, (be sure to put the cover in the door first), it
was simply pulled into place and the velcro secured it in place. It was
necessary to notch the back edge to clear the cable.


|
|
Once the panel was fastened, the door was put in place, shock
connected, speaker cover put in place and speakers added.


|
|
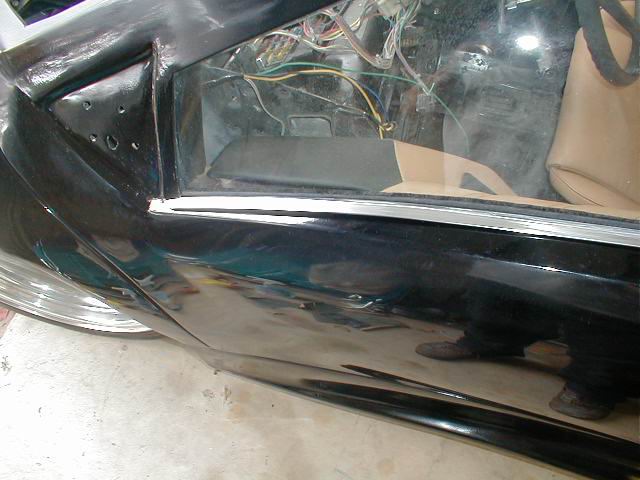
To install the weather stripping on the outside of the window, I pop
riveted it to the door. I then used 1 1/2 aluminum carpet trim cut to
shape to cover the rivets. I still need to paint the strips and glue them
to the door but it will ad a nice finish.


|
I purchased some the speakers for the stereo system and the cables for
connecting. Still need to get an amp.

|
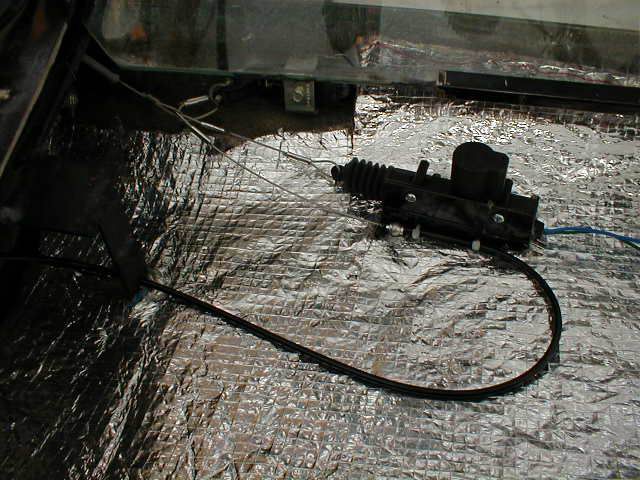
Started on the interior door handle. I inserted the handle through the
interior panel and made a U bracket to hold it in. I will be using a
bicycle cable to connect to the actual door release mechanism. I
fabricated a bracket that will be bondoed and glassed to the inside of the
door panel. This holds the cable steady when the door handle is pulled.
The cable will actually be strapped to the bracket with wire ties when it
is finally installed.
 

|
I marked the speaker location to make sure it cleared the door
mechanism on the inside. I marked off the area on the door with masking
tape so the leather would not be scuffed by the saw. After cutting out the
hole I fitted the outer ring on the speaker and screwed the assembly to
the door. The grill snaps into the ring. I set the door panel on the door
to see how it will look. I'm still working on a way to fasten the door
panel to the door without actually using screws on the outside.
 
 
|
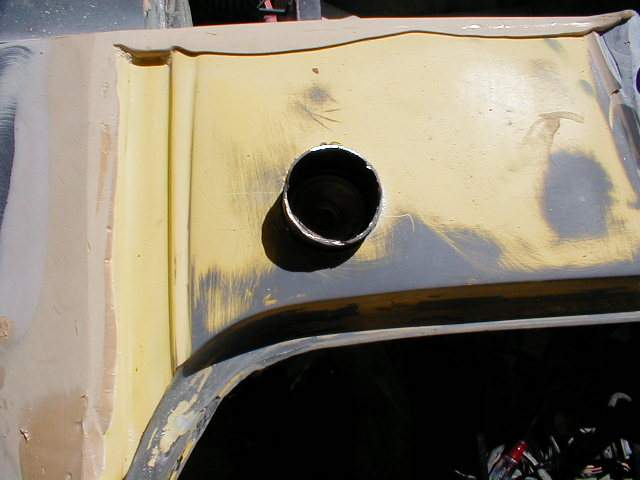
I needed to fill in the front edge of the door to match the body. I
covered the primed surface with waxed paper and masking tape. It turned
out pretty good. Still need to do the primer.
 
|
Got glass in both doors now. Still need to do bit of minor tweeking on
Drivers side. I will be glad to get these behind me. Small things that
when you narrow the door, you end up with space issues for clearance. When
you don't listen to your own advice, the frame get twisted. I hope the
small crack on the bottom edge of the glass will not grow any longer.


|
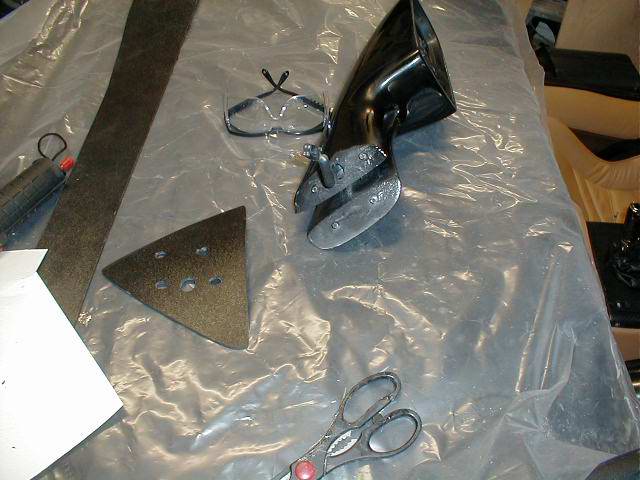
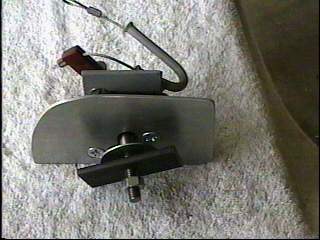
Worked on the mirrors. To fasten them, I drilled a hole in each leg
large enough to accept the head of a 1/4" bolt. I then cut a slot to
either side. Using 90 minute epoxy, I secured the bolts to the inside of
the mirror legs. After they were set, I filled in the gaps with bondo. I
drilled a hole through leg into the cavity and inserted the mirror motor
into the mirror case. I then marked the door to accept the bolts and
a hole for the mirror wires to go through the door.


|
The drivers door had to be fixed to align it properly. When the gas
shock was not installed, the alignment was fine, but under pressure, the
bottom edge of the door was about 3/4" outside the body edge. I attempted
to reposition the frame inside the door but nothing worked to my
satisfaction. My solution was to cut a slice from the inner door, clamp it
together and then use a temporary plate to hold it in place. I then
glassed the two pieces together inside the door, applied bondo to the
outside and now it aligns perfectly under pressure.
 
 
|
I installed rubber seals on each side that the roof actually rests on.
Just about finished with roof.
 

|
I crated the brackets to hold the roof receivers. First I drilled hole
to accept the posts. I then fabricated "T" shaped brackets that would hold
the latch assembly. These were bondoed in and later glassed in. I used 2"
tube to align over the latches. I welded small tabs on the tubes and then
bondoed them in place. I also had to redo my third brake light holder for
final fit.


|
|
I replaced the original receivers with the new style that swivel. It
was necessary to grind out the original location. I welded small tabs on
the receiver fitted the roof with a spacer to simulate the weather seal
and then bondoed them in.
 
 
|
|
How to stretch a roof in four easy steps. When I spliced in the new
roof line and modified the receiver, I found I was about 5/8" short. I cut
a slice off of the roof and then using paint sticks and masking tape, I
aligned the pieces. I used Glass mat and cloth as well as dowels between
the tow pieces to close the gap. Finish with bondo and you are all done. I
will need to do slight mods to the center brake light so the roof will
seal properly.
 
 
|
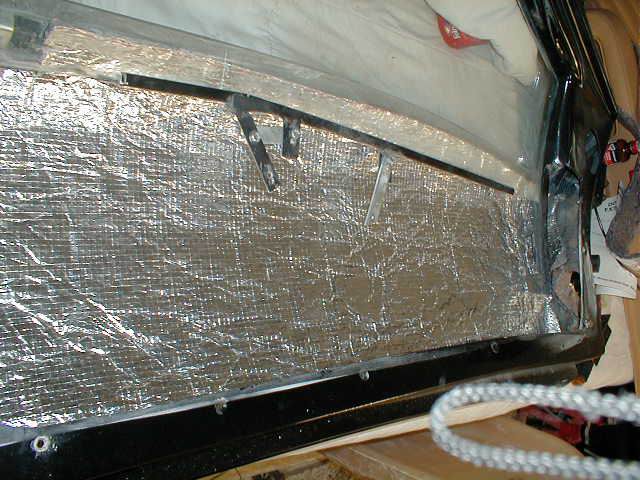
I added an additional support to the window post to add additional
stability. I am in the process of grinding the fiberglass away from the
tube steel installed by IFG so I can add an additional plate. All is
welded now and I also added a support from the dash to the cross member to
make the side a little stronger


|
I installed braces from the firewall to a support for the door striker
for each door. This will support the striker as well as give me some
additional side protection.
 
 
|
.I worked more on the mirrors. The mirrors have an impression where
the motor goes. Check to see that when the mirror motor is positioned that
the control pivits are verticle and horizontal. Next cut out the opening,
and drill a hole in the top leg to accept the wires from the motor.
 
 
|
 The parts consist of the plate on the that will be attached on
the inside of the door, the latch mechanism, plate, cable opener and
striker that is attached to the door The parts consist of the plate on the that will be attached on
the inside of the door, the latch mechanism, plate, cable opener and
striker that is attached to the door
  Once the latch is assembled, the by pulling on the cable, the
lever opens the striker plate and release the door. Once the latch is assembled, the by pulling on the cable, the
lever opens the striker plate and release the door.
|
|
 Now cut an opening in the door that will allow the latch
mechanism to fit through. Now cut an opening in the door that will allow the latch
mechanism to fit through.
 Trial fit the plate. It will then be necessary to
drill three additional holes through the plate and the door. You will have
to cuntersink the holes and then fasten with the 1/4" stainless bolts with
flat washers and lock nuts on the inside. Do not put them too close to the
edge or the bolts will tilt as you try to tighten them because of the
curvature of the fiberglass on the inside. Trial fit the plate. It will then be necessary to
drill three additional holes through the plate and the door. You will have
to cuntersink the holes and then fasten with the 1/4" stainless bolts with
flat washers and lock nuts on the inside. Do not put them too close to the
edge or the bolts will tilt as you try to tighten them because of the
curvature of the fiberglass on the inside.
|
 Finished plate Finished plate

 I
added two 1/4" bolts through the bottom two holes. I also added a plate on
the inside for the bolts to go through to add some additional strength to
prevent any twist at the hinge plate. I
added two 1/4" bolts through the bottom two holes. I also added a plate on
the inside for the bolts to go through to add some additional strength to
prevent any twist at the hinge plate.
|
 The striker pin is installed through the fiberglass with the
plate on the backside. I will fasten the strike plate to reinforcing when
the body is permanently mounted.
The striker pin is installed through the fiberglass with the
plate on the backside. I will fasten the strike plate to reinforcing when
the body is permanently mounted.


Create a
loop with cable through the latch cable. Drill a hole in a washer to
attach to the door latch. Use cable crimpers to close the loop. I found
the cable crimps and special crimpers at a fishing supply store.
| | | | | | | | | | | | | | | | | |